Add structured checks or forms to a job, complete them and seal the finished worksheet when it is ready.
Before you start #
- A suitable worksheet template must be available in your account.
- Choose whether the worksheet should be Internal Only before adding it.
Open Worksheets #
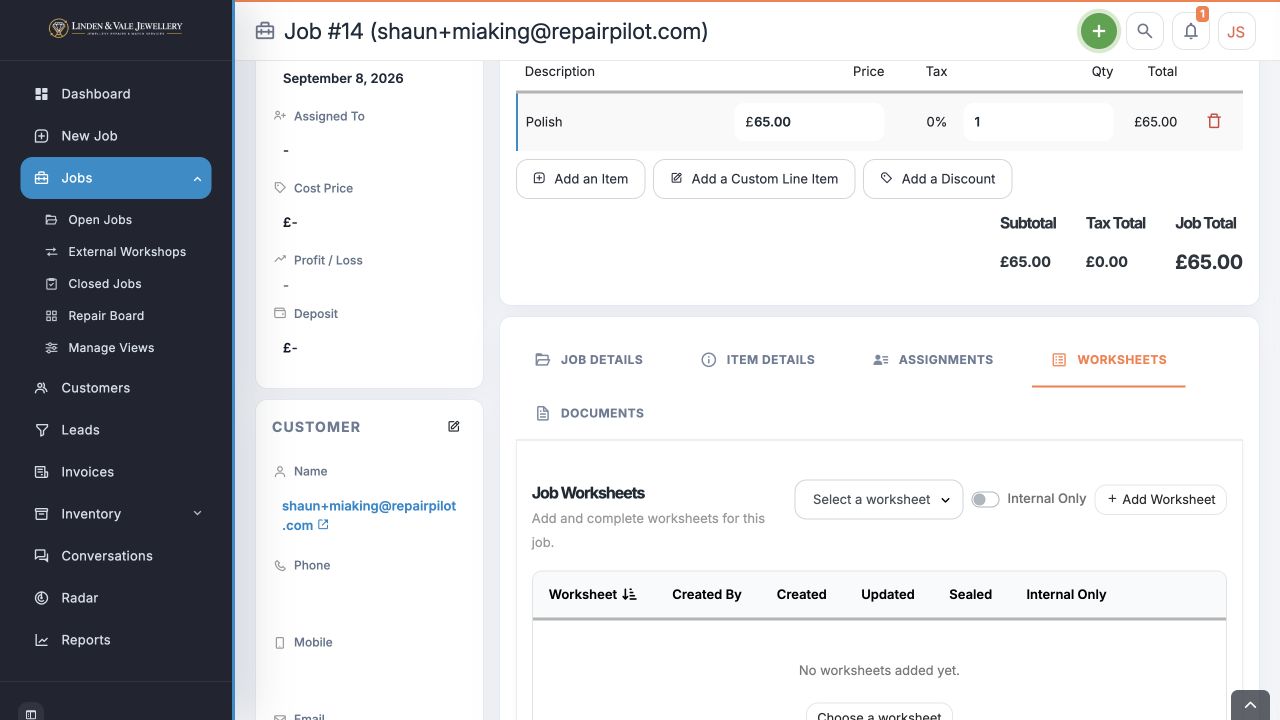
Open the job and select the Worksheets tab. This lists the job’s worksheets, including creation details, sealed status and internal-only status.
Add and complete a worksheet #
Choose a template in Worksheet, set Internal Only as required and select Add Worksheet. Open the added worksheet, complete the checks or fields it contains and save your work using the controls shown. The contents depend on the selected template.
Review and seal the completed worksheet #
Review the completed answers before using the worksheet’s seal action. Sealing prevents further edits, so finish corrections first. The worksheet list’s Sealed column lets you check its state.
What happens next #
A sealed worksheet remains available to open for preview and printing, but its contents can no longer be edited.
Common questions #
Can I still print a sealed worksheet? #
Yes. Sealing prevents edits; it does not prevent previewing or printing.
Why is my required worksheet missing from the selector? #
Check that its template has been created and made available in your account’s worksheet setup.
Related guides #
Last verified: 22 October 2026. Screenshots and instructions reflect Repair Pilot at the time of review.